Initial situation: The scenario consists of two branches (A and B) with public IPv4 addresses and a main office, also with a public IPv4 address. The two branches have already set up a static IKEv2 VPN tunnel to the main office, and this is running. The VPN peer at the branches is called "MAIN". Branch A has the subnet 192.168.1.0/24 and branch B has the subnet 192.168.2.0/24 with the name "INTRANET".
Configuration at branch A
-
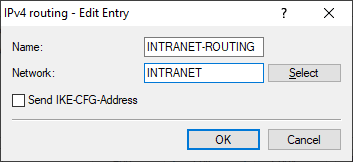
The Routing parameter transmits the local network to the opposite branch, in this case the "INTRANET" network. To do this, create a new entry in the
IPv4 routing table under . For example, select "INTRANET-ROUTING" as the name and, in the
Network field, select the local network to be used for Mesh VPN, e.g.
"INTRANET".
Figure 1. Example of the IPv4 routing entry
-
Under Authentication, set the option Manage source. Create a new entry, e.g.
"MESH". Enter the Local identifier of the branch and the PSK used for all
dynamic mesh tunnels. The PSK must be identical on all branches involved in the mesh VPN tunnel. This is then entered in the
Remote password field. Leave the field Remote identifier blank and select the
option "No identity" for Remote identifier type, so that all incoming identities with the correct PSK
are accepted as mesh tunnels.
Figure 2. Example authentication settings

-
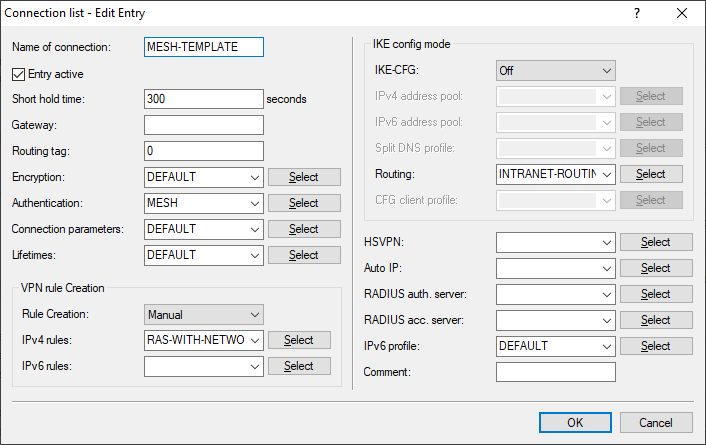
Set Rule creation to "Manual".
Figure 3. Example of the Mesh VPN template in the connection list
-
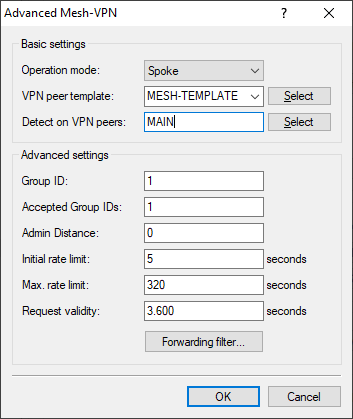
Under Detect on VPN peers, select the name of the VPN peer that corresponds to the name of the tunnel to the main office.
Figure 4. Example of Advanced Mesh VPN settings in the branch office
Configuration at branch B
Configuring the main office
-
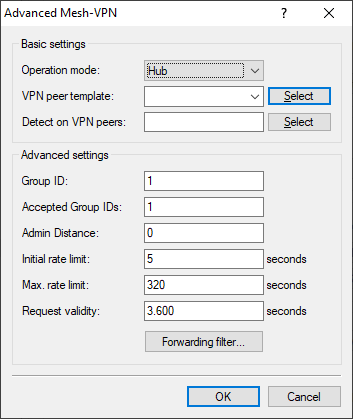
Since the main office itself does not set up a dynamic mesh tunnel, there is no need to create a template for the peer. Set the Operation mode for the Advanced Mesh VPN to "Hub".
Figure 5. Example of Advanced Mesh VPN settings in the main office
If you now transfer data from branch A to branch B, the first packets take the detour via the main office. After that, the dynamic mesh tunnel is set up between the branches.
Important: A ping to the router’s IP address at the other end will not establish a mesh tunnel. A (possibly non-existent) station in the LAN at the other end must be used as the destination.