This tutorial describes how to configure a (dual-stack) PPPoE client in the router’s local user table. The client receives an IPv4 address from the address pool, optionally an IPv6 prefix via router advertisement, and a delegated DHCPv6 prefix.
-
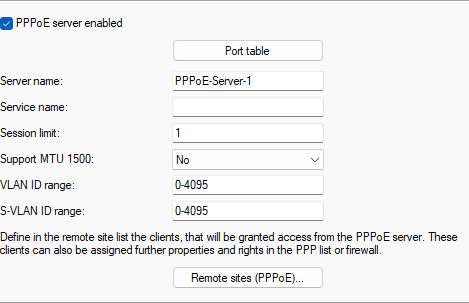
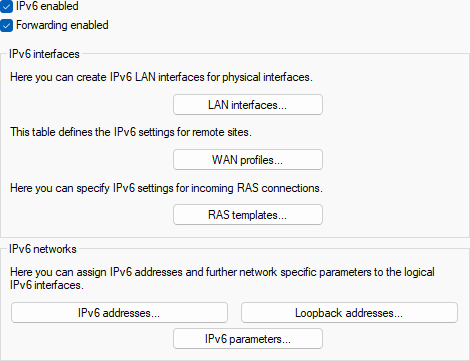
Open the configuration under .
- Enable the PPPoE server enabled option.
- Under Server name, assign a name to the PPPoE server. This name is displayed to the PPPoE clients for identification in the status display
-
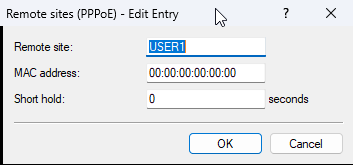
Open the Remote sites (PPPoE) table.
- Add a Remote site and assign it a name. This is also the username of the PPPoE client and must be provided to the user as part of the access credentials.
- Leave the MAC address field empty.
- Set the Short hold to 0. This means that the PPPoE client actively establishes the connection, and the server does not actively terminate it, except in the event of an LCP polling timeout
-
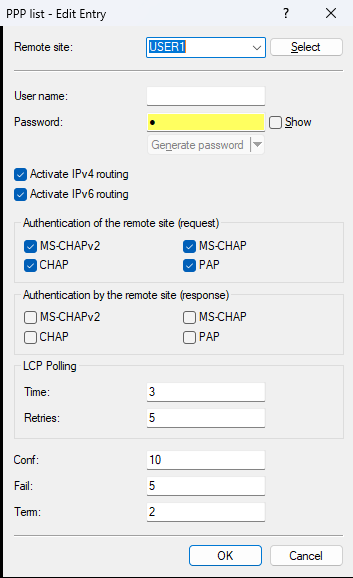
Open the PPP
list under . Add
a new entry and make the following adjustments:
- For Remote site, select the remote site created in the previous step.
- The User name field is not used for PPP dial-in in the role of PPPoE server on the LCOS and must therefore be left empty here.
- In the Password field, enter the password of the PPPoE client.
- Use Activate IPv4 routing to enable or allow IPCP negotiation and the assignment of IPv4 addresses to the client.
- Optionally, you can also use Activate IPv6 routing to allow IPv6CP negotiation and the use of IPv6 for the PPPoE client.
- Under Authentication of the remote site (request), enable the permitted authentication methods with the PPPoE client.
- Under Authentication by the remote site (response), the selection must be left empty. The PPPoE server is not supposed to authenticate itself to the client.
- Under LCP Polling, set the Time value to 3 (internally multiplied by 10 for 30 seconds) and the Retries value to 5.
-
The address pool for PPPoE clients is defined under :
Option Description First address First IPv4 address of the dial-in pool, e.g. 10.0.0.2. Last address Last IPv4 address of the dial-in pool, e.g. 10.0.0.5. Primary DNS First IPv4 DNS server to be assigned to the PPPoE clients. Secondary DNS Optional specification of a second IPv4 DNS server to be assigned to the PPPoE clients. 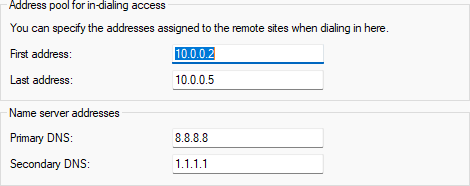
-
Optionally, also enable IPv6 under .
-
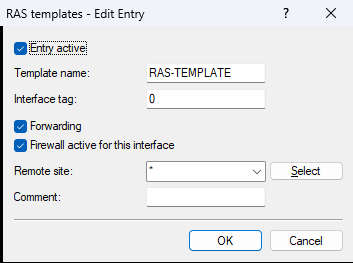
Enable the IPv6 RAS templates under .
-
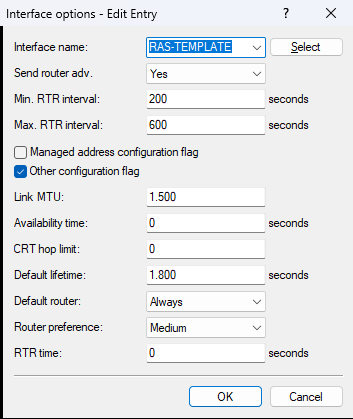
Under , create a new table entry. For
Interface
name, select the "RAS-TEMPLATE" you just activated, and for
Default
router
select "Always".
-
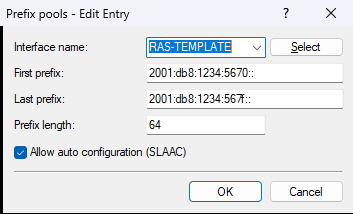
Under , create a new table entry. For
Interface
name, select the "RAS-Template", and for First prefix, enter the first IPv6 prefix of the pool to be
assigned to clients. For Last prefix, enter the last IPv6 prefix of the pool to be assigned to
clients. The Prefix length must be exactly /64.
-
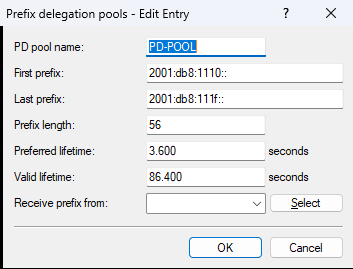
Under , create a new table entry. For
PD pool name,
use the name "PD-POOL", and for First prefix, enter the first IPv6 prefix of the PD pool to be assigned to
clients. For Last prefix, enter the last IPv6 prefix of the PD pool to be assigned to
clients. Under Prefix
length, configure the prefix length of the DHCPv6 prefix to be assigned to a client.
Usually, /56 is used as the prefix length.
-
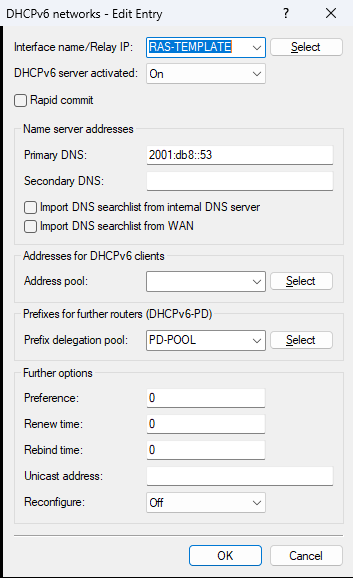
Under , create a new table entry. For
Interface
name/Relay IP, select "RAS-TEMPLATE". Set the option
DHCPv6 server
activated to "On".
Under Primary DNS, configure which IPv6 DNS server address is to be assigned to the client.
Under Prefix delegation pool, configure the name of the previously created DHCPv6 PD pool
"PD-POOL".
-
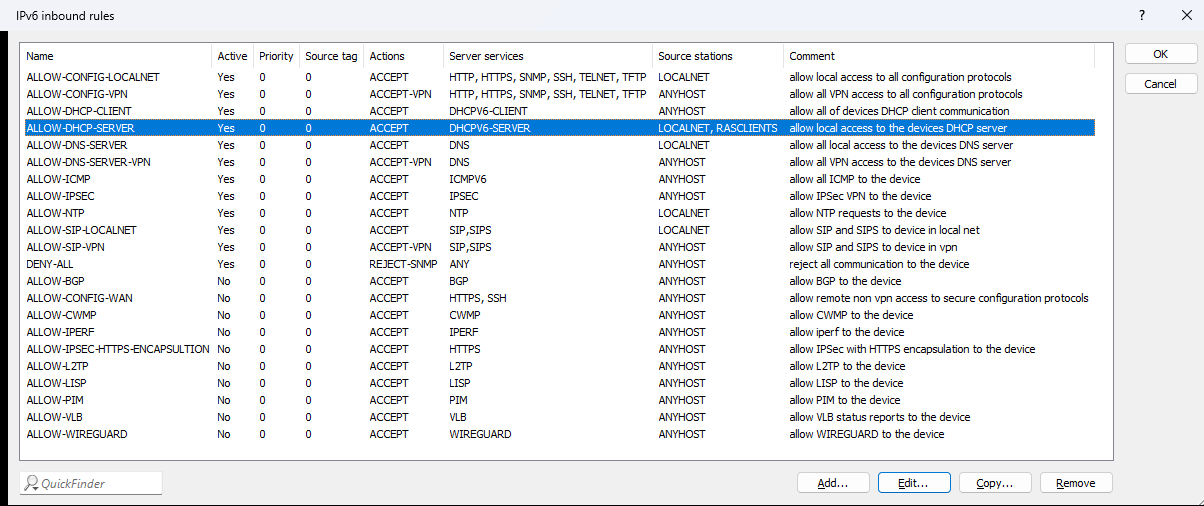
Check in the IPv6 inbound rules that "Allow-DHCP-Server" is allowed from the source stations
"RASCLIENTS". In addition, "Allow-DNS-Server" must be allowed from the source stations
"RASCLIENTS" if the LANCOM
router itself is to act as the IPv6 DNS server for the PPPoE clients.
-
Check in the IPv6 forwarding rules that the "Allow-RASCLIENTS" rule is allowed. The
IPv6 prefixes used in this scenario for router advertisements or DHCPv6 PD pools must
generally be allowed by a firewall rule in the forwarding case and must not be blocked by a DENY-ALL rule

-
Enable the IPv6 RAS templates under .
Status information for all active PPPoE clients is displayed in the table under .
Detailed information about an individual client can be displayed with the show command "show pppoe-user-detail <user-name>".
Analysis options are provided by the trace command "trace # ppp".